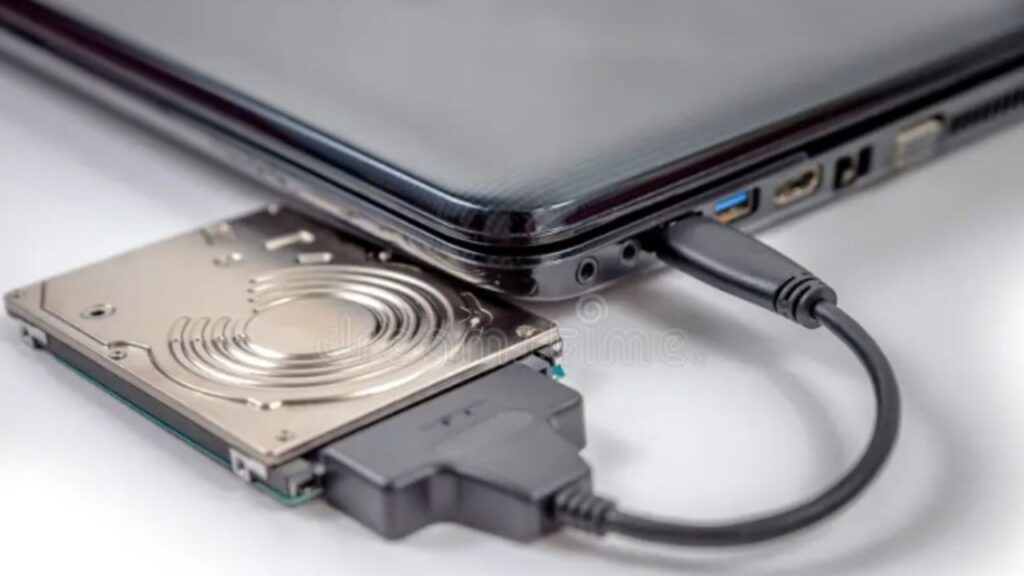
If you’re looking to repurpose or access the data on your laptop’s internal hard disk without installing it back into the laptop, you can use a laptop internal hard disk to USB connector.
In the world of digital storage, there often comes a time when you need more space on your laptop. Upgrading your internal storage is a cost-effective solution, and fortunately, it’s a task that can be accomplished with relative ease.
In this article, we’ll guide you through the process of connecting an internal hard disk 1 TB to your laptop, ensuring you can seamlessly expand your storage capacity.
How to Connect an External Hard Drive to a PC Without USB
All the examples so far have concerned an internal hard disk drive that requires data removal from it. But what if you had an external hard disk drive that you needed to connect to your PC to remove data, but the device had an issue with USB, preventing connection?
Fortunately, the solution is a combination of a couple of the answers covered above. All you need to do is open the external drive enclosure, then use an adapter or a docking station to connect it to your PC or laptop. If you’re particularly handy with a screwdriver, you can install the HDD into a spare bay in your computer.
Materials Needed:
- Internal hard disk drive (HDD) or solid-state drive (SSD)
- Screwdriver
- External hard disk enclosure or SATA-to-USB adapter
- USB cable
- Laptop
Step 1: Choose the Right Hard Disk Drive (HDD) or Solid-State Drive (SSD):
Before you start, ensure you have the correct internal hard disk for your laptop. Check your laptop’s specifications to understand the type and size of the drive it supports. Additionally, consider the storage capacity you need and whether an HDD or SSD is the better fit for your requirements.
Step 2: Back Up Your Data:
Before making any changes to your laptop’s storage, it’s crucial to back up your data. This ensures that if anything goes wrong during the installation process, you will retain important files. You can use an external hard drive, cloud storage, or a backup tool to secure your data.
Step 3: Power Off and Disconnect:
Please turn off your laptop and disconnect it from any power source. It’s essential to work in a static-free environment, so consider grounding yourself by touching a metal surface before proceeding.
Step 4: Locate and Remove the Existing Drive:
Most laptops have a dedicated compartment for the internal hard disk. Consult your laptop’s user manual or search online for instructions on how to access and remove the existing drive. Using a screwdriver, carefully open the compartment and gently disconnect the current drive.
Step 5: Prepare the New Hard Disk:
If you purchased a new hard disk, it might need to be prepared for installation. Please attach it to an external hard disk enclosure or use a SATA-to-USB adapter to connect it to your laptop temporarily.
Step 6: Connect the New Hard Disk to Your Laptop:
Using the same compartment or a different one, carefully connect the new hard disk to your laptop. Insure it is securely in place, and use the screws to fasten it if necessary.
Step 7: Close Up and Power On:
Close the compartment and secure it using the screws. Power on your laptop, and it should recognize the new hard disk. If needed, you may need to go into your laptop’s BIOS settings to ensure the new drive is detected.
Step 8: Format and Partition the New Drive:
Once your laptop recognizes the new drive, you may need to format and partition it. It can typically be done through your laptop’s operating system. Follow the on-screen instructions to complete this process.
Step 9: Restore Your Data:
Now that your new internal hard disk is installed and formatted, you can restore your backed-up data. Transfer your files from the external backup to your laptop’s new storage.
Conclusion:
Expanding your laptop’s storage by connecting an internal hard disk is a practical and cost-effective solution for those in need of more space.
By following these step-by-step instructions, you can successfully upgrade your laptop’s storage capacity, ensuring you have ample room for all your files and applications.
Always remember to handle the hardware with care, back up your data, and consult your laptop’s user manual for any specific instructions related to your device. Happy upgrading!

